How to repot Monstera: We repot Monstera by first watering our Monstera for some days before cleaning its roots from the old earth and filling it with new soil into a new pot; this is transplanting Monstera.
Have you noticed that your Monstera is outgrowing its current Pot, or is your Monstera plant looking a bit cramped? It might be time to give it a new pot.
Looking for how to repot or transplant your Monstera? Don’t worry, I’ve got you covered; repotting your Monstera is a simple and rewarding process.
Before we dive into the step-by-step guide, let’s look at some points before transplanting the monstera plant.
Also 👉click here to read how To Transplant A Bonsai Tree.
How To Know When To Repot Monstera
Some signs show It’s Time to Repot Your Monstera plant.
When The Roots Start Growing Through Drainage Hole
Sign: If you notice that your Monstera roots start coming out of the pot drainage holes or circling the surface of the soil, your Monstera is signaling it needs more space.
Then, chances are your plant has grown larger than its current pot size can handle.
Low-Quality Soil
Low-quality soil can be a big problem for any potting Plant. Using the wrong soil will lead to less nutrients and make the roots of your monstera cluster together.
Bad soil can also cause waterlogging, and water luggage can cause root rot, leading to disease and infection in your plant.
The only means to remove lousy soil from your potting plant is to repot it, even if you did not change the Pot.
Bad soil can also dry out water quickly because it cannot retain water, while other bad soil can hold water without letting it flow out of the drainage hole.
Some bad soil is like clay soil, and some low-quality soils are loose and light.
Drooping Leaves
Observing your Monstera Wilting Drooping Leaves, even after a good watering, might be a sign of stress, or waterlogging suggests your Monstera’s roots might be struggling.
Drooping Leaves indicate that the current pot no longer provides sufficient nutrients, and the monstera root is crowded and utilizes all nutrients.
Yellowing Leaves
Seeing your Monstera plant with yellow leaves is a sign that there is something wrong with the foundation of your plant.
It is important to check the soil to know if there is water luggage or soil dryness.
Suppose the roots of your monstera are facing difficulty. In that case, it will reflect on the leaf and affect your plant’s growth, making it annoying for the owner.
Once more, various factors can contribute to these problems, so before you think of repotting, be careful to determine the root of the problem.
When a stressed-out plant is placed in a new container, it may cause more growth issues.
Slow Growth
Observing slow growth in your monstera plant results from root crowdedness, meaning your plants need to be transplanted as soon as possible.
If you see the new Leaf of your Monstera plant is Smaller than the previous leaf, This is a good indicator that your plant has a reduced growth rate.
Once you have noticed all these signs, repot the Monstera plant.
Wrong environment and maintenance, such as overwatering or extremely low temperatures, can also result in stunted growth.
However, repotting can be the solution if the plant is in the proper location and has grown well.
Pot-Bound Signs
When you observe your monstera root plant growing circularly, it is to show that there is a limit of space and nutrients.
Transplanting your monstera plant is the best option for the plant to grow.:
Open the Pot and check If you see a circular Growing pattern of roots.
When roots start wrapping around the container, it indicates that your Monstera needs more space to grow.
I also suffered from this type of issue before repotting my Monstera plant. To notice if the rule is pot-bound, I will give you a simple step on how I did mine.
Lift the Pot If it feels unusually light when you lift it, your Monstera might be using up all the available space, leaving little room for soil.
Bushier And Crowded Appearance.
For Your Monstera to be bushy and crowded competes with itself for light and nutrition. It is suffering stress.
Suppose it is growing bushier and more crowded. In that case, I will suggest that repotting can contribute to a roomier and healthier growth environment.
Like other house plants, Such as snake plants, When They are bushy and Crowded, they produce flowers for ignoring them for a while.
Did you have a snake plant? Click here to learn how to make your snake plant flower.
What Is The Best Time Or Season To Repot Monstera?
The best time of year to transplant monstera is during the active growing season, which runs from late winter or early spring before fresh new leaves grow.
Additionally, Monstera plants are hardy and can withstand transplanting at any time of the year if their general needs are met.
It is important to avoid transplanting monstera in winter, but if the climate is mild, you can repot in autumn.
I usually repot my Monstera when it outgrows its Pot. Transplanting is necessary to ensure that the plant has enough room to grow.
What Do I Need To Repot Monstera?
To fully comply with the Monstera transplant algorithm, prepare everything you need in advance.
To transplant Monstera into a new pot, you must gather your tools. Which are listed below.👇
- You’ll need a larger pot with drainage holes; ensure the new pot is 1-2 inches wider than the formal one.
- Fresh potting mix.
- The monstera you want to repot
- pebbles or expanded clay for drainage;
- disinfectant that contains alcohol [optional]
- a trowel
- gloves: Trust me, your hands will get dirty
- Clean water for irrigation
- Spry can [optional]
- Sterilized pruners
My Pot Has No Drainage Holes What Should I Do
Method 1: If there are no drainage holes in the Pot you purchased for transplanting the monstera, you can make them yourself.
To do this, take a pencil and mark the places (4-6) where the holes will be on the bottom of the Pot.
Then, take matches or a lighter and hold the Pot over the source of fire so that the tongue of the flame falls exactly in the right place.
When the plastic melts, take the scissors, press lightly on the softened place, and make a hole.
Enlarge it by turning the scissors clockwise, then cut off the pieces of plastic that stick out.
In this way, make several holes, then wash the soot from the Pot.
Method 2: heat metal in fire 🔥, and when it gets hot, use it to open 4 to 6 holes at the bottom to give the hole gap.
Method 3: opt for dill; use a drill with a university bit with a large diameter to open the hole at the bottom.
If the hole is small, use a Sharp object with a V-shape like scissors ✂️ to enlarge the hole.
Click here to read about the types of drill bit.
How To Repot Monstera Plant Step By Step
Okay, let me say you’ve decided it’s time to transplant your Monstera into a new pot.
Repotting a house plant is rewarding because it allows those monstera roots to stretch out and thrive well.
Let’s dive into How to transplant a monstera plant step-by-step to ensure your lovely monstera thrives in its new Pot.
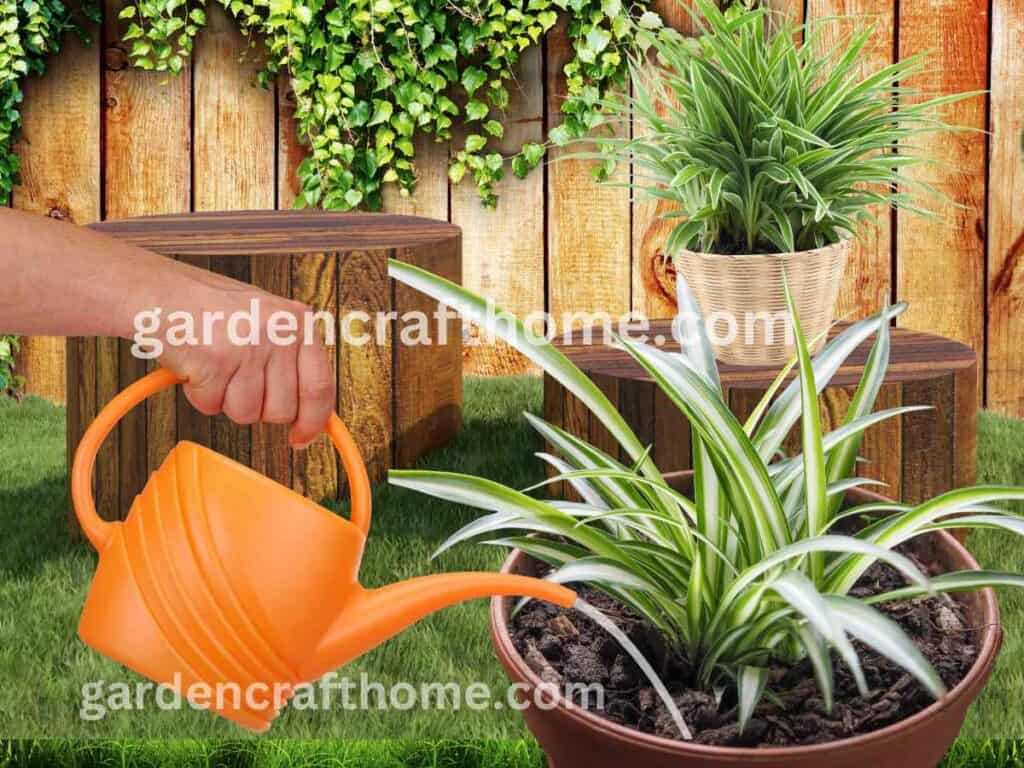
Caution: ‘Make sure you water your Monstera a few hours or a day before repotting.’
Moist soil makes it easier to slide the plant out of the soil without causing too much trauma to the roots.
On the other hand, well-hydrated soil before repotting or transplanting makes your monstera overcome repotting stress.
Blow👇 is a step-by-step guide to ensure your Monstera repotting goes well.
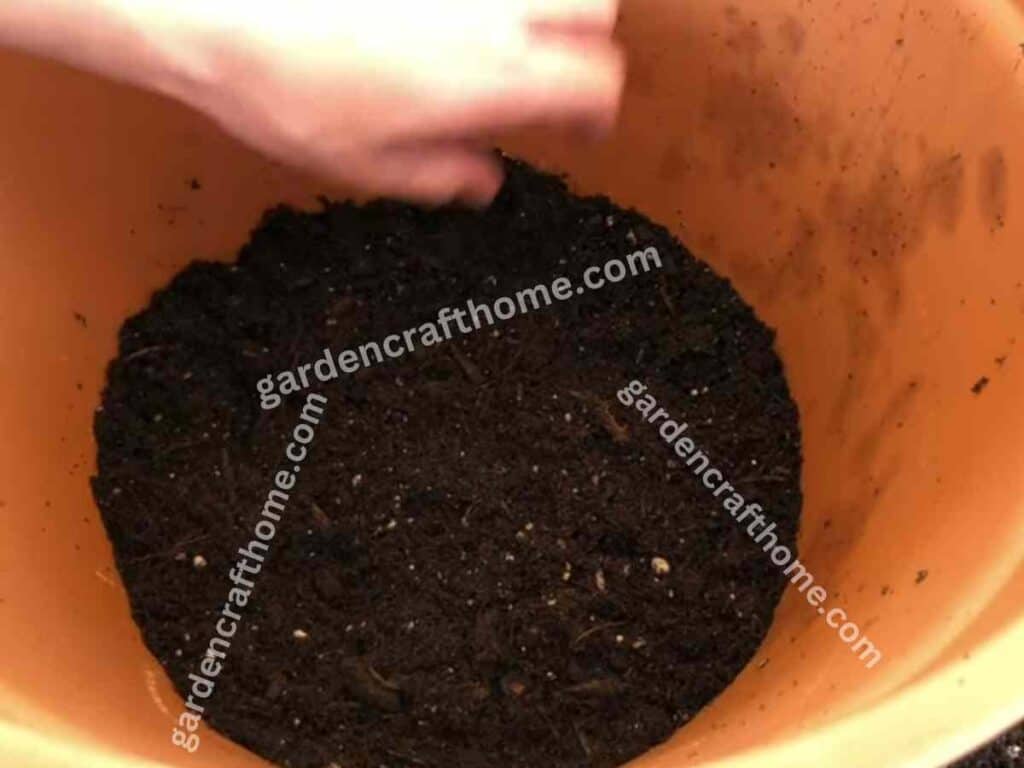
Step 1: Filling The New Pot
Take the Pot you want to transplant the monstera and pour a drainage layer on its bottom.[optional]
Expanded clay, river pebbles, broken bricks, or tiles suit this capacity.
Make sure those pebbles you added are not closing the holes in any way.
Drainage is necessary for the plant to prevent water stagnation in the soil.
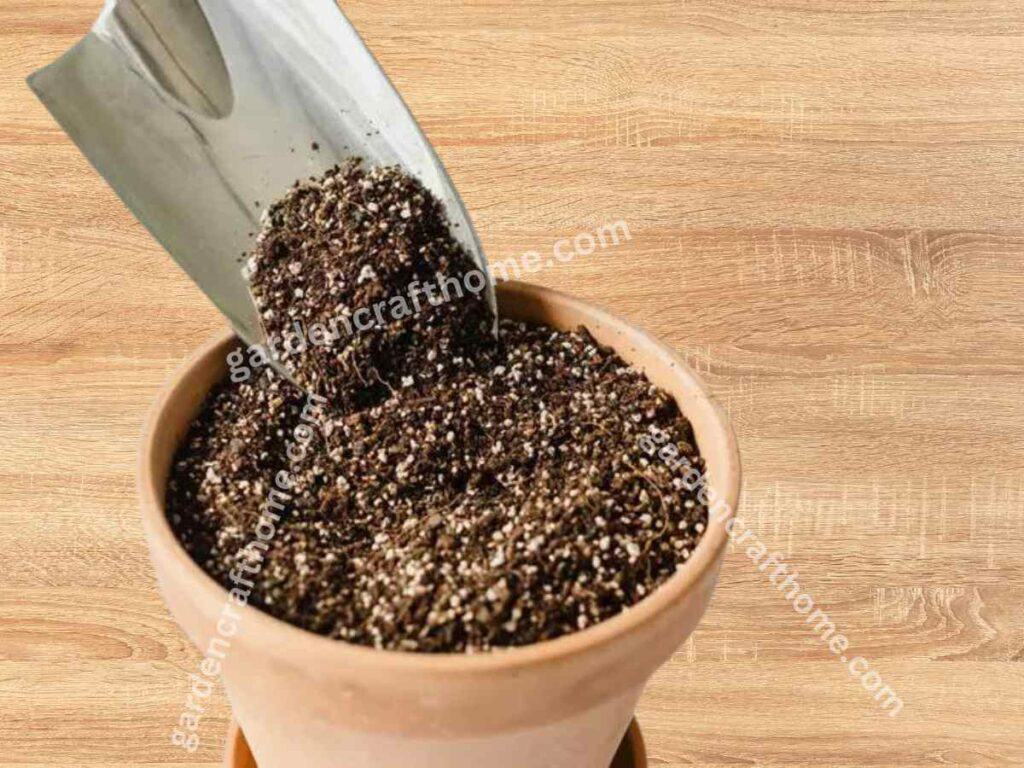
Take the fresh potting soil and pour some on the drainage layer, about a quart of the Pot.
Click here to learn how to prepare a pot before planting.
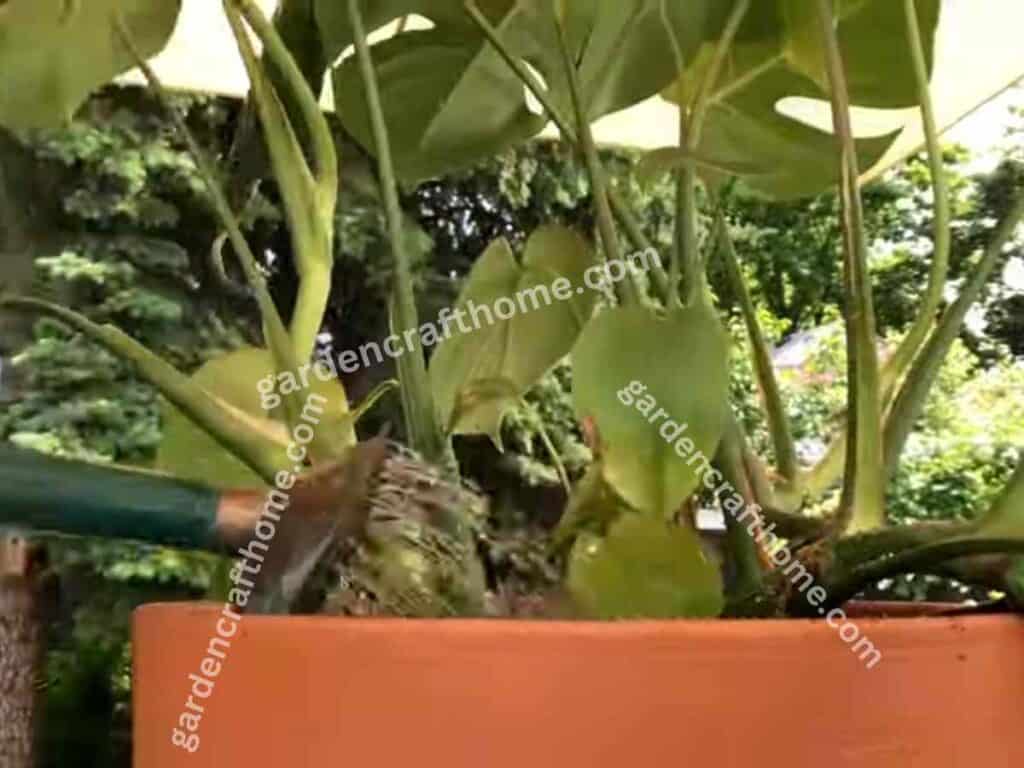
Step 2: Remove The Plant From The Old Pot:
Place the Pot and plant on top of a table. Then, lie the Pot sideways, supporting the base of the plant trunk with your hand.
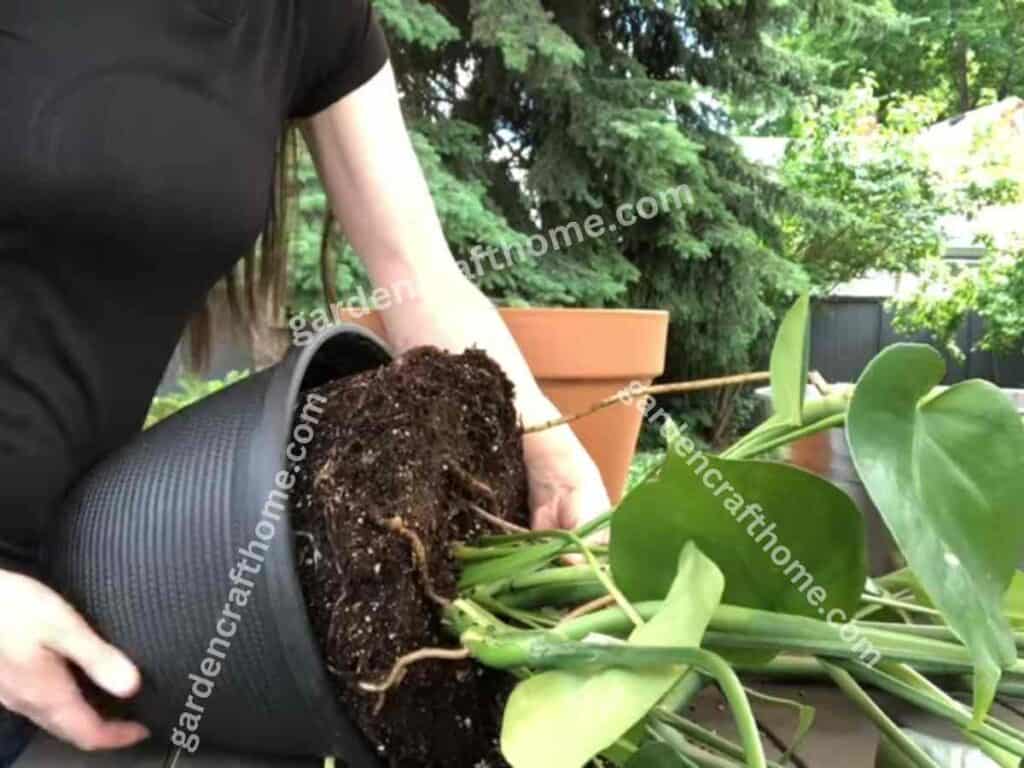
Tap around the Pot a little on each side to free the root ball, and while firmly holding the plant by the bottom of the trunk, release the plant from the Pot with rotational movements.
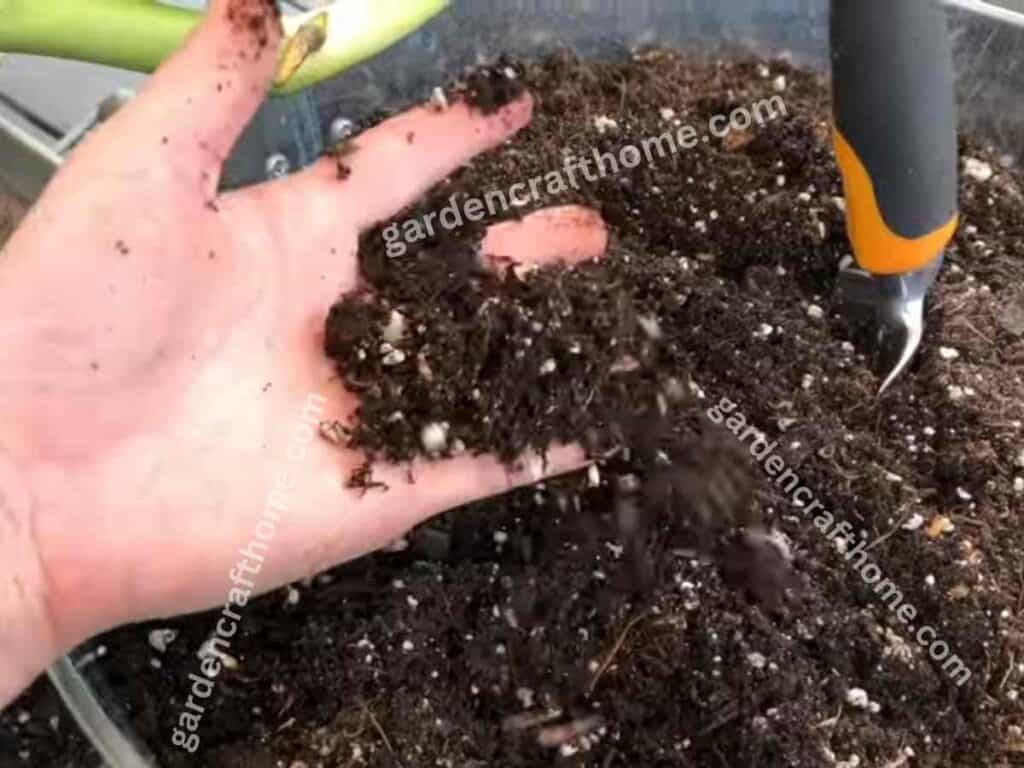
Step 3: Free The Root Ball
Free the root from the soil and lose the root; the loosening technique of repotting is crucial to avoid transplant shock and ensure healthy plant growth.
Here are three important things to keep in mind when loosening the root ball:
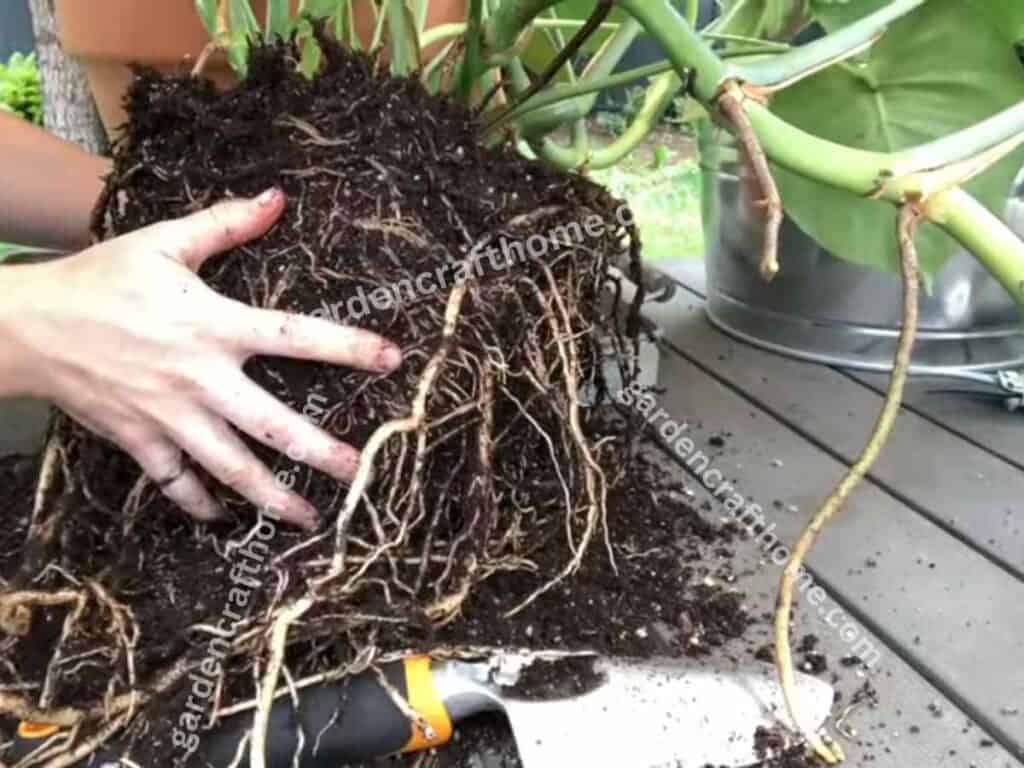
- Gently: Use your fingers or a small tool to gently press and loosen the root ball. Avoid applying too much force to the root so you won’t damage the roots.
- Massage the roots: Once the root ball is loosened, gently massage the roots to separate them and help them emerge from the root ball. It will encourage new root growth and better nutrient absorption.
- Take your time: Loosening the root ball may require patience, especially if the plant has been in the same Pot for a long time. Take your time and be thorough to make sure all roots are loose before transplanting.
Step 4: Trimming The Root
Disinfect the scissors with alcohol. Cut off all the old leaves and dried parts of the plant. Instead of scissors, you can also use a sharp knife.
But at the same time, remember that the leaves and stems of Monstera contain poisonous substances; for this reason, it is better not to take a table knife you use for cooking.
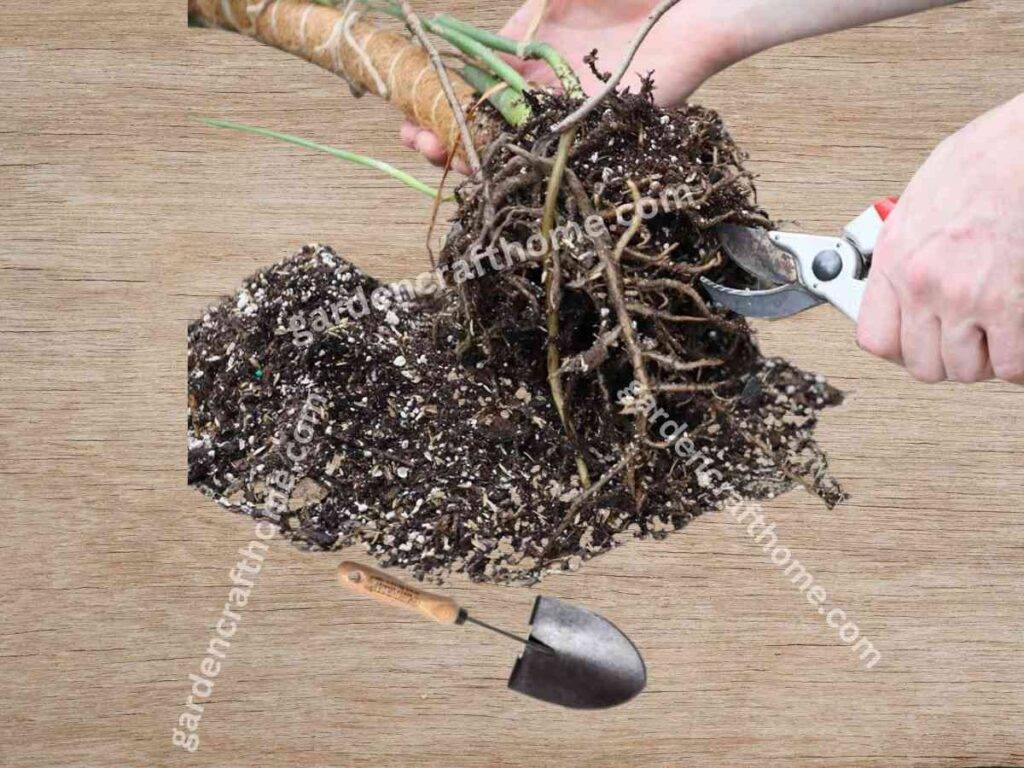
You can remove any ugly or extra-long roots; leave the thickest roots at the base. Don’t be afraid to trim.
If your plant is root-bound to the Pot, meaning the roots grow in tight circles around the pot’s base, untie the roots as best you can.
Note⚠️: mind your trimming. Don’t remove plenty of root ball at once, as removing plenty will lead to shock, which might be hard to revive.
Step 5: Transplant The Plant
Place the plant inside the new Pot on top of the new layer of soil mix, ensuring it is centered, then add the new soil around the plant until it is secure.
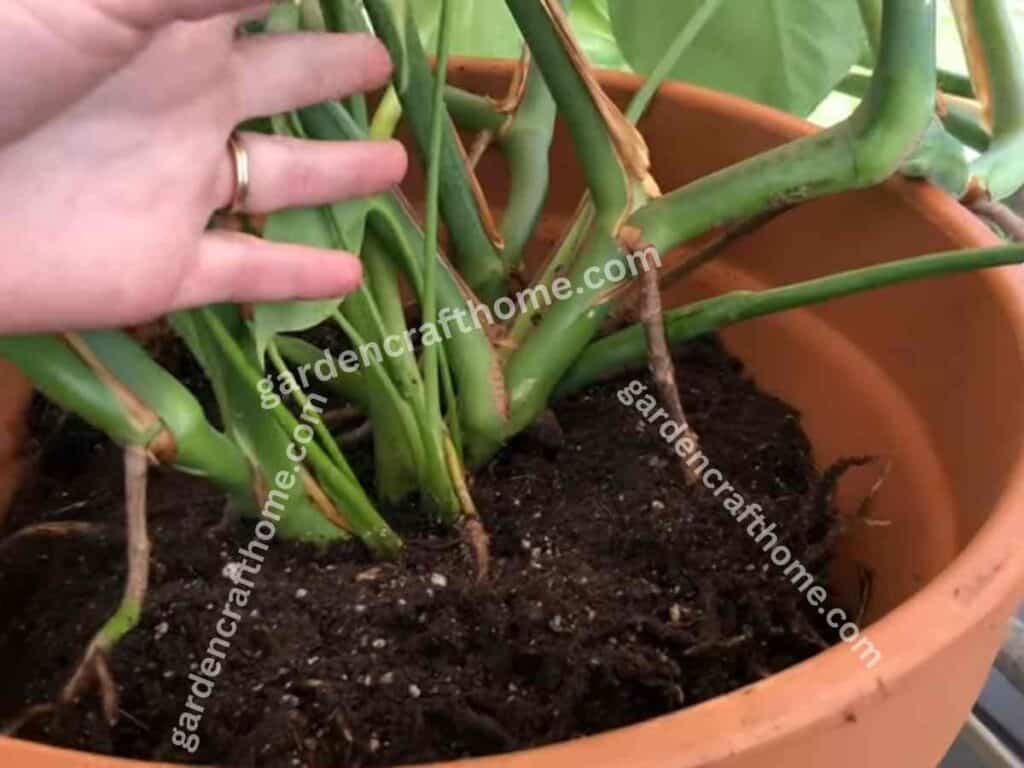
Ensure you don’t pack too much soil in the Pot, as you want the roots to breathe.
Never fill the soil to the monstera trunk, and Never fill the Pot to the pot top. Give an inch or two below the top of the Pot.
Filling to the top can cause soil to split out during watering. If you fill the Pot up to the rims, Press the soil down gently but avoid firmly. The soil form becomes compacted.
Step 7: Water The Plant
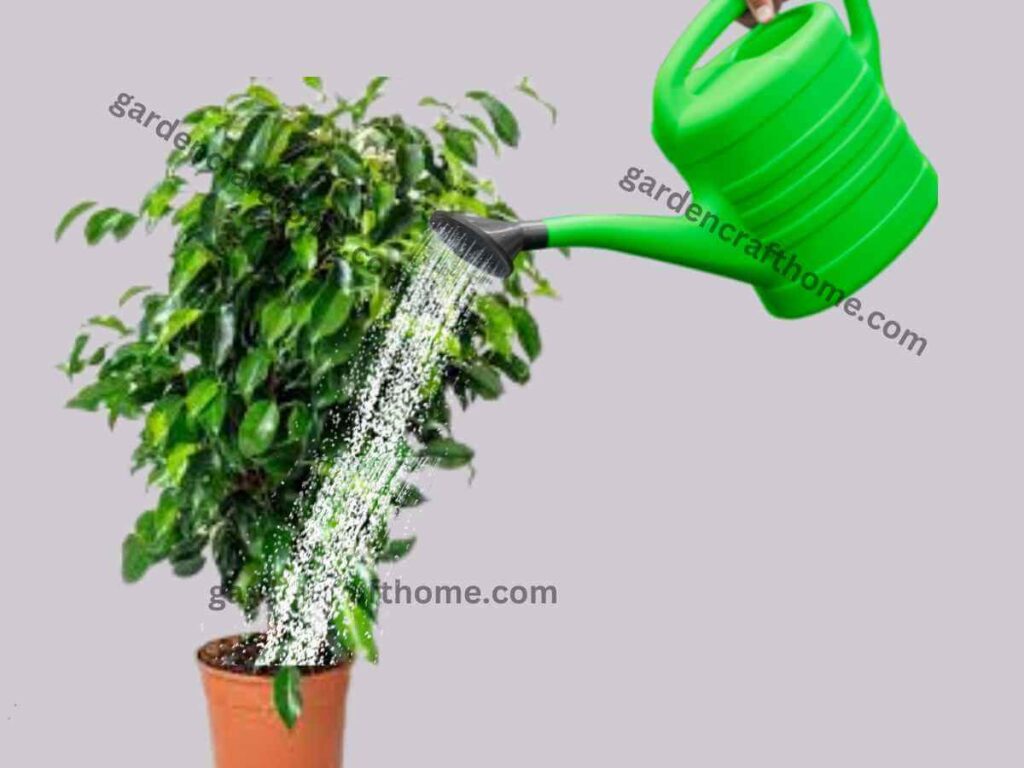
Give your repotted Monstera a enough drink. Immediately after transplanting, the Monstera needs abundant watering.
Water the monstera plant till you see the water rushing out of the drainage holes. Don’t worry if it looks overwatered. It will adjust Within a week or two.
Then, let the soil dry well and return the monstera to watering, which is traditional for the season you transplanted.
Click here to read how to water a bonsai tree.
Step 8: Position Your Monstera
Keep your newly repotted monstera where it will receive indirect sunlight. If you insist on keeping it indoors, place some stone inside a basin and the Pot inside it.
The basin will hold the water coming out from the Pot while the stone will help lift the Pot for the dripping water.
Remove the basin when the water stops dripping.
I invite you to read how to propagate the Monstera seed 👉click here.
How To Care Monstera After Repotting
After transplanting, make sure your new Pot is well-drained. Pour excess water out of the saucer.
Water the monstera regularly, perhaps once or twice a week in most conditions, as it gets used to its new Pot.
Stop fertilizing your Monstera in the weeks after transplanting. Your potting mix most likely contains nutrients.
It may also be helpful to place the plant in its new home before it is bombarded with nutrients.
Give Monstera a few months before fertilizing it with quality organic houseplant fertilizer.
Why Do I Need To Repot My Monstera?
Here are some reasons why you should repot your Monster:
- Monstera plant is too dense / leaves are wider than Pot;
- The roots emerge from the Pot, either through the top or through the drainage holes;
- The current planter doesn’t bring you joy
- It is now late winter or early spring.
- The plant has not been transplanted for a year or two.
Also, I was hoping you could read how to design your plastic flower pot to look beautiful like I did. Click Here To Read.
How Often To Repot Monstera
Monstera plants are usually repotted once a year, often in early spring or late winter.
Young plants are transplanted into a few centimeters wider planters, allowing them to grow.
Mature plants are removed from the pots to prune the roots and then transplanted with fresh potting mix.
A young monstera, up to 3-4 years old, requires an annual transplant. Then, the plant is replanted according to age. Recommendations for transplantation:
Indoor flowers 3-4 years old – once every two years; over five years – every 3-4 years, with annual replacement of the top part of the soil.
Regular replanting of the plant allows you to maintain its health and stimulate growth.
If you see one or a combination of these signs, you’ll know it’s time to repot:
- The roots grow through the drainage hole at the bottom of the Pot.
- The roots push the plant upwards, out of the Pot.
- The plant grows slower than normal.
- The plant is extremely top-heavy and falls over easily.
- The plant dries out faster than usual and requires more frequent watering.
- The aerial parts of the plant take up more than three times the space of the Pot.
Pot plants should be repot every 12 to 18 months, based on how fast they grow. This is because minerals and salt can build up in the plant.
Some plants can stay in their Pot for years but only need a soil change.
What Is The Best Pot For Monstera?
The best pots for Monstera are those that drain very well and are large enough to hold the large leaves of a growing plant.
Unglazed earthenware and ceramic pots, like classic terracotta, give airy, permeable sides and considerable weight.
Monstera planters have built-in drainage holes and a saucer that matches and sits under the pot to catch drips.
Other large planters are waterproof and usually used as pots with an outer layer and a thin plastic nursery substrate (Monstera is planted in a nursery pot, and then the whole thing is placed in a waterproof outside pot).
Click here to learn how to waterproof a planter.
When you get a new pot for your young Monstera, try to find one that is a little bigger than the one you already have. The plant will be able to grow bigger.
Click here to learn how to choose a pot [planter].
Giant plants may do better in a pot of the same width (after root pruning).
If you plan to pot the plant soon, ensure the Pot you choose is deep enough for the support pole/post.
If the Pot you choose has drainage holes but does not come with a saucer, be sure to place a drip pot under the Pot to protect the surface.
Click here to read about the types of planters,
Do Monsteras Like Small Or Big Pots?
As I said, a general rule is that the size of the Pot You should use for your Monstera Must be one-third to half the size of the root ball or spread.
I advise you to Consider both the width and depth measurements while choosing pots for your Monstera.
Selecting containers with adequate space below and surrounding the roots is important since a deep container may promote downward rather than upward root development.
We should Avoid using large Pots since big Pots can retain too much moisture and store more soil than is necessary, which might result in illness, insect infestations, or even root rot.
Instead, if your Monstera grows at its best rate, you should repot it yearly. At that time, gradually increase the size of the container.
Monstera deliciosa prefers to start in smaller pots to promote good root development and vertical growth.
The Monstera has to be moved into bigger pots as it matures to make room for its growing root system and give it access to more water and nutrients.
On the other hand, very big pots should be avoided since they might result in problems, including overwatering and water retention.
For example, the specific type of pot material, plastic or terra cotta, also affects how much moisture is retained.
Making judgments on whether to upgrade to a larger pot is guided by regularly monitoring the plant’s size and health, ensuring the Monstera’s general well-being.
Common Mistakes When Repotting A Monstera Plant
I will tell you common mistakes when repotting a Monstera and others you know plant. I will list them for you so you won’t be a victim.
In the last couple of years, I have also been a victim of two or three of these mistakes, so I don’t want to face the same challenges, I may say.
Certainly! Here’s a concise list of common mistakes when repotting a Monstera plant:
1. wrong soil:
When repotting a monstera, ensure you use potting soil that has nutrients. Avoid repeating the old soil because no more nutrients are left.
2. Choosing the wrong pot size:
The number one reason we repot our plant is that it has outgrown its pot, so using a smaller pot or the same size as the initial one is useless.
As I said earlier, it is recommended to use a port wider than the initial one, about one or two inches.
3. Failure to inspect and pruning the roots:
Pruning removes dead branches, roots, leaves, stems, and outgrown plant parts.
So inspecting means searching for those dead parts to cut off.
4. Repotting at the wrong time:
I told you when to repot a plant to avoid stress and nutrient deficiency.
Before now, I said. The best time of year to transplant monstera is during the active growing season, which runs from late winter or early spring before fresh new leaves grow.
So, maintaining the right time has to avoid potential issues that might be hard to revive.
5. Not watering properly after repotting.
It is a good idea to give your Monstera enough water to drink immediately after transplanting the Monstera.
Fill them with water until water starts rushing out of the drainage hole. Don’t worry if it looks over water, but it will adjust.
6. Using blunt and unsterilized cutting tools
Always use sharp running tools to avoid infections, as this is very important and the first precaution.
7. Direct sunlight or a shaded area.
Our house plants need indirect sunlight and not direct sunlight.
Avoid keeping your monstera in fluctuating temperatures like air conditioning.
Also, please don’t keep them where they won’t receive light at all.
Window light is preferable, but heavy sunlight is a bad idea, so make a wise decision.
8. Failing to support the plant during repotting.
It is recommended to place the pot on top of a table and then lie it sideways and support the base of the plant trunk with your hand; failure to do this might result in losing your plant trunk.
9. Disturbing the roots too much
Disturbing the roots too much is another problem. Still, this one can be fixed by watering them and leaving them to stop touching or breaking unnecessary roots.
10. over-running the root
When trimming the roots, ensure to sterilize your pruning tools and cut the necessary root you want: avoid disturbing others’ roots.
11. fertilization after repotting
Don’t fertilize your Monstera after repotting because the potting soil contains nutrients that can support the plant in the long run.
Once the plant has fully established itself, you can continue fertilizing.
Avoid all these things because they can cause stress to your plants. Most especially, never fertilize immediately after transplanting.
What Type Of Soil Do Monsteras Like?
The best soil for Monstere is a light, air-filled organic soil mix. These plants do not thrive in moist clay garden soils. Monstera prefers well-drained tropical-type soils.
Soil for Monstere generally contains coconut, bark, peat moss for the total mass, and perlite and lava rock to capture air pockets in the soil mix (allows soil aeration).
Finally, most high-quality potting soil mixes contain organic fertilizer.
Can I Cut The Roots Of Monstera When Repotting?
Yes, you can cut the root of your monstera when repotting. Inspect the roots and Make sure you cut the dead roots and dead leaves.
Trim the monstera roots and free up the root ball before Transplanting.
A general advice I will give you: never cut too much root because cutting plenty of your root can Result in stress or many issues that can be challenging to fix.
I advise you to use sharp and sterilized garden shears, scissors, or knife to cut the dead root during cutting.
If you notice your garden shears are not sharp, click here to read how to sharpen a garden shears[link]
How Do I Make Monstera Grow Better?
Below is the best way to improve your monstera and strive optimally. Below are the things I did to make my monstera grow well.
Putting your plants in a comfortable condition and temperature makes them grow better than other plants in uncomfortable environments.
Light:
- I advise you to keep your monstera in bright and indirect light, not direct sunlight.
- Avoid direct sunlight because it damages house plants. The tips will turn brown when direct sunlight hits your house plants such as spider plants.
Click here to learn why your spider plant tips turn brown and how to solve it.
Watering:
- Before you water, let the top inch of dirt dry out.
- Ensure the soil drains well and the pot has holes to let water out.
- Adjust the watering frequency based on the season.
Humidity
- Maintain higher humidity levels.
- Misting, trays of water, or humidifiers can help.
Temperature
- Keep temperatures between 65-80°F (18-27°C).
- Protect from drafts and sudden temperature changes.
Soil:
- Use well-draining soil mix.
- A combination of potting soil, perlite, orchid bark, or sand is suitable.
Fertilization
- During the growth season, feed with a balanced fertilizer that dissolves in water.
- Avoid over-fertilization; fertilize and monitor your plants before topping fertilizer.
Support And Pruning:
- Provide support for growing stems and leaves.
- Prune to encourage bushier growth, but use sterilized scissors or knives.
Repotting:
- Repot the plant when it is outgrowing the current container; I always monitor my plant before repotting.
- Pick a pot that is a little bigger and has holes in it for draining.
Propagation:
- Consider propagating through stem cuttings: I will say you should be careful when cutting stem for propagation, but if you want to know how to propagate correctly, click here to learn how to propagate your monstera plant.
Pest Control:
- Monitor for pests and treat promptly with insecticidal soap or neem oil.
I will confidently say if you follow these steps, your plant will grow healthy, but if you notice any issues, check your plant’s soil.
How Often Should I Water My Monstera?
How frequently should you water Monstera? Keep to the normal watering rules; water when the soil is dry is about 2 to 1 inch.
To indicate if the soil is dry, use your finger inside to feel if the soil is wet. I invite you to read the complete article about watering monstera plants. Click to read. [link]
How Do You Know If Monstera Is Happy?
They are setting signs to show your monstera is happy or in the right condition; below is the list of signs I found out when my monstera plant is happy;
– Healthy, vibrant green leaves.
– Steady growth, especially during the growing season.
– Minimal yellowing or browning of leaves.
– Production of new, healthy leaves.
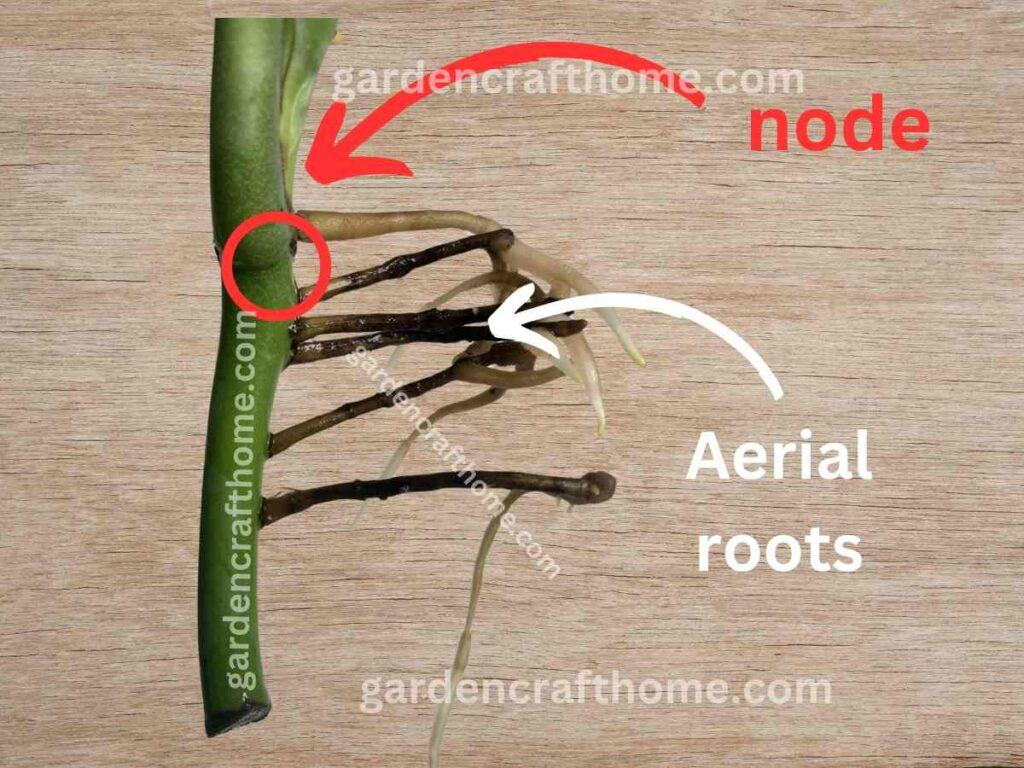
– Presence of supportive aerial roots.
– Firm and healthy stems.
– Absence of pest infestations.
– Stable leaves and nodes.
– Aerial growth and splitting leaves (fenestrations).
– Normal leaf size for the plant’s age and variety.
– Regular pupping (production of offsets in some varieties).
Conclusion
Repotting your Monstera plant is a simple and rewarding process like that of other potted plants.
I emphasize the importance of repotting a plant at the right time, using the right soil and pot size, and providing proper care to ensure your Monstera remains vibrant and thriving.
As I always say, repotting is necessary and can contribute to plants’ overall health, as water is also necessary to plant
Remember to maintain a drainage hole and inspect your roots before pruning. If you follow these steps I provided, your monstera will flourish.
Did you have a matured monstera? Is it time to propagate them? Click here to learn the propagation process.